Composing using ACID Drum Loops on a Boss BR-1600CD
An Application Note by Gene Cookmeyer
![]()
http://www.topsoundproductions.com
Use of ACID loops is a very common way of prototyping new song ideas, as well as constructing complete finalized songs. Do BR-1600CD users need special software to do this? No! As a BR-1600CD user, already have the ability to use "off-the-shelf" ACID drum loops to create new songs. This application note discusses how to use ACID Drum Loops to compose drum tracks on a Boss BR-1600CD.
Note to the Reader: During the course of reading this application note you can zoom in on any photographs by clicking on it, then using your browser's BACK key to return to the article.
Author's Note: Make sure you upgrade your BR-1600CD to Version 1.10 or higher of firmware. This firmware and the instructions to install it is available for download from Roland's website.
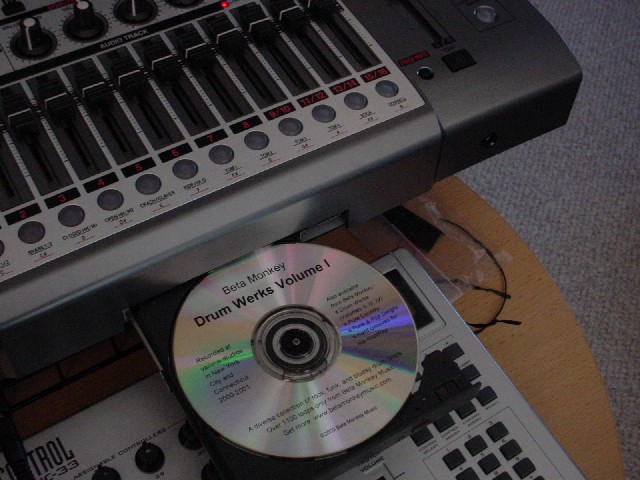
Importing Loops into the BR-1600CDOur first job is to first get the ACID drum loops you are interested in using onto the BR-1600CD. To do this we will follow the instructions on page 180 of the BR-1600CD user’s guide: “Using wave data on a CD-ROM/R/RW disc (Loop Phrase Import)”.
- Place your CD containing your drum loops into the BR-1600CD drive.
- Press the CD-R/RW control button “Loop Phrase Import”.
- Press the F1 (IMPORT) key or move your cursor to the IMPORT icon and press ENTER.
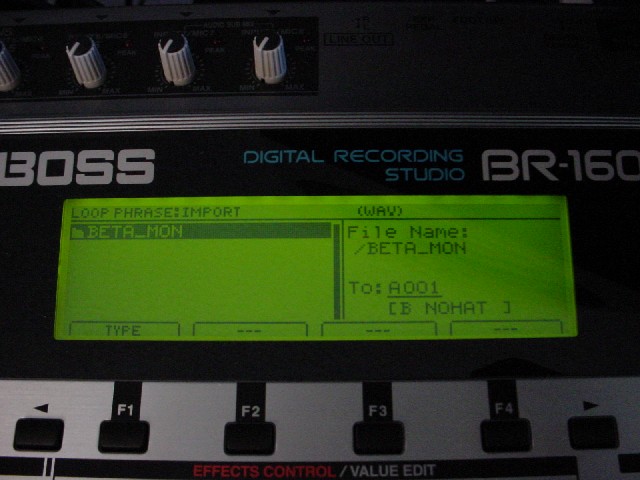
- Select the directory containing the drum loops you want to import using the cursor keys and pressing ENTER. You can use the F2 (PREVIEW) key to preview any of the loops before you import it. Note that the Boss BR-1600CD only displays 8 characters of all file names... this can make it difficult to distinguish between different loops with similar names. Use the PREVIEW button to distinguish the loops audibly.
- Very important: Before doing anything, make sure you cursor to the right and change the To: A001 to the bank you want to import the loop phrase(s) to (i.e. E001). The first time I did this, I overwrote the preset drum patterns that are built into the BR-1600CD, causing me to have to restore these preset drum patterns from my backup.
- The F3 (ALL) key will cause all loops in the directory to be selected. A maximum of 50 loops can be imported at once.
- Press F4 (GO) to start the import process. Loops that are very short are rejected by the BR-1600CD and you will receive a message concerning this. This is a limitation of the BR-1600CD that is documented in the user manual.
Here’s how I went about creating the demo drum loop and bass arrangement that I put together to test this procedure.
- Create a new song (Press UTILITY then find the SONG Function Key (usually F2 on the first menu page), then find the NEW Function Key (usually F3 on the first menu page). I selected BASS+LOOP PHRASE as the Track Type for my new arrangement. The press the GO (F4) function key.
- Make sure the PROGRAMMABLE RHYTHM [ARRANGEMENT/PATTERN] is lit (you’re in Arrange
Mode).
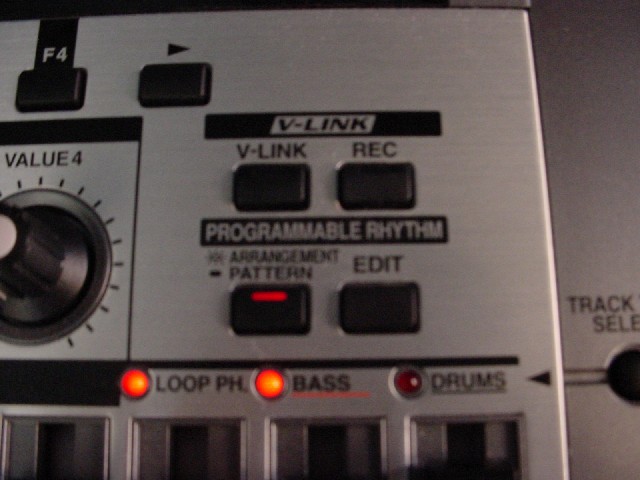
- Now click the PROGRAMMABLE RHYTHM [EDIT] button to go into edit mode.
- Move the cursor to the rhythm arrangement number to create a new arrangement. Use the TIME/VALUE dial to select the number. For my arrangement I set it to U001.
- Set the tempo you want using the down cursor key and the TIME/VALUE dial, for our example we set it to 115 bpm.
- The track buttons for Tracks 11/12 (Loop Phrase) and 13/14 (Bass) should already be flashing green, if they are not push them until they do.
- Make sure the faders for Tracks 11/12 and 13/14 are raised appropriately, and that the master fader is raised as well.
The first thing we’ll do is arrange the drums, then we’ll add the bass. For our arrangement, lets do a 2 bar intro, a 3 bar verse, 1 bar fill, a 3 bar 2nd verse, 1 bar fill, a 4 bar chorus, and an 2 bar ending.
Follow these steps to create the arrangement:
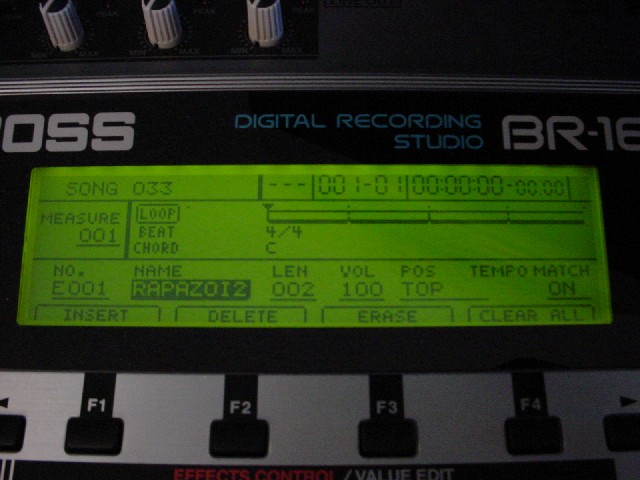
- Still in the edit mode, press the F2 (LOOP PHRASE) button. You’ll see a
screen similar to this:.
- As you’re editing, make use of the transport control buttons (ZERO, REW, FF) buttons to navigate forwards and backwards through your arrangment. They make navigating your arrangement and editing extremely easy AND you can hear what you’re composing by pressing PLAY at any location in the arrangement.
- Move the cursor to the No. field, and select the pattern that you want to use and the length (LEN) the pattern will play (the total number of measures). For our example, we’ll select E001 (the name is RAPAZOI2), move the cursor two fields to the right and set the LEN to 002, leaving the rest of the fields as defined.
- Press PLAY to hear what you have so far.
- Press REW after the song is done playing until you get to the end of the arrangement.
- Repeat steps 3-5 until you’ve composed your drum loop arrangement.
Now we’re finished the drum loop arrangement, here is what it sounds like after we’ve completed this step.
Adding the Bass ArrangementLet’s add a bass arrangment now. I’m going to just use the built in bass patterns of the BR-1600CD for this example. Since the drum loops we’re using are of the fairly funky variety, I’m going to select some of the R&B patterns that Boss ships with the unit. For chords, I’ll keep it simple. Just some standard chords in the key of C.
- Press EXIT to exit Loop Phrase mode.
- Press F3 (BASS) to enter Bass arrangement edit mode.
- Press ZERO to return to the first measure.
- Press down cursor to select the bass pattern, we’re starting with P388 (R&B 01-V1).
- Set the LENGTH field set to the number of measures you would like the pattern to play.
- Use PLAY, REW, and FF to listen to what you’re composing.
- Repeat steps 4-6 until your arrangement is completed.
But what about chord changes? You might ask. I intentionally left editing chords for last, because it requires switching edit modes, and easier to write about if I made it one more step.
Adding Chord Changes- Press EXIT to exit Bass arrangement mode.
- Press F1 (EDIT) to edit the arrangment.
- Press F1 (CHORD MAP) to edit the chord map.
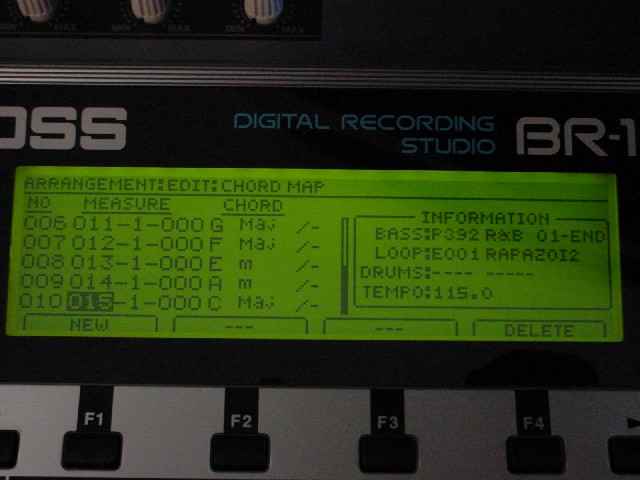
- Press F1 (New) to add a new chord change, then use the cursor key to change what measure the chord starts in, and what chord to play.
- Repeat step 4 until your arrangement is completed.
Now we’re finished adding the bass arrangement, which will play over whatever chords you put in your chord map. Here is what it sounds like after we’ve completed this step.
Saving Your ArrangementNow save your arrangement so it can be recalled in the future.
- Press EXIT twice to exit the chord map edit mode.
- Press F4 (WRITE/COPY/DEL)
- Select the destination user rhythm arrangement (we used U001).
- Press F4 (GO).
- Now your rhythm arrangement has been saved.
Now your that your bass/drum canvas is completed, you can add additional solo/vocal tracks over them, then mix and master the final song!
If you want to use other ACID loops to your project, you’ll need to BOUNCE your loop phrase track to another track before adding another loop phrase, since the BR-1600 only has one loop phrase track. Also the BR-1600CD does not do pitch stretching of loop phrases so make sure that the loops you use are compatible with the key that you’re composing in.
The BR-1600CD also gives you the ability to create your own Bass Loop patterns, but this is beyond the scope of this application note. I encourage you to read the User Manual and experiment with this functionality on your own.
Happy Recording!
BR-1600CD is a trademark of Boss Corporation
 |
Order WAV-MAKER-1600 today! Visit this link to order now!. |