Running WAV-MAKER-1600 in a VM on Mac OS X
An Application Note by Gene Cookmeyer
![]()
http://www.topsoundproductions.com
At Top Sound Productions, we occasionally get questions about a version of WAV-MAKER-1600 that runs on the Mac. Since we’re a mostly Windows-Based DAW production studio, we don’t have enough investment Mac gear to justify the time and effort of porting our utility software over to the Mac. But we have found an alternative – run WAV-MAKER-1600 under Windows running in a VM on the Mac. This App Note discusses the steps involved in how to make this happen. Using this procedure theoretically makes any software that runs under Windows runnable on under Mac OS X, so you don't have to have a copy of WAV-MAKER-1600 in order to make use of this application note. Also if you haven't purchased a copy of WAV-MAKER-1600, you can get your VM running under Mac OS X first; then when your copy of Windows is successfully installed and ready for Windows native applications, order your copy to start converting BR-1200CD and BR-1600CD projects to WAV faster.
Choosing VM Software
The following are just some of the virtualization software that’s available for running Windows alongside Mac OS X:
- Parallels Desktop ( http://www.paralels.com )
- VM Ware ( http://www.vmware.com/ )
- Oracle VirtualBox (https://www.virtualbox.org/ )
- Or you can use “Bootcamp” and boot separately between Windows and Mac OS X.
While basically these VM Software options provide the same functionality, they all have differences to the GUI so for this App Note our instructions are for Oracle VirtualBox.
You will need a Windows install disc or ISO image and a serial number to install it. You may have an old install disk of windows that didn’t use all of its available licenses. My instructions are for Windows XP.
Instructions for Oracle Virtualbox (Free)
- Download and install Virtualbox for Mac OS X. The version I downloaded when I wrote and tested this process was Virtualbox-4.3.12-93733-OSX.dmg.
- Once installed look in your Applications folder for the Virtualbox Application.
- Click “New”.
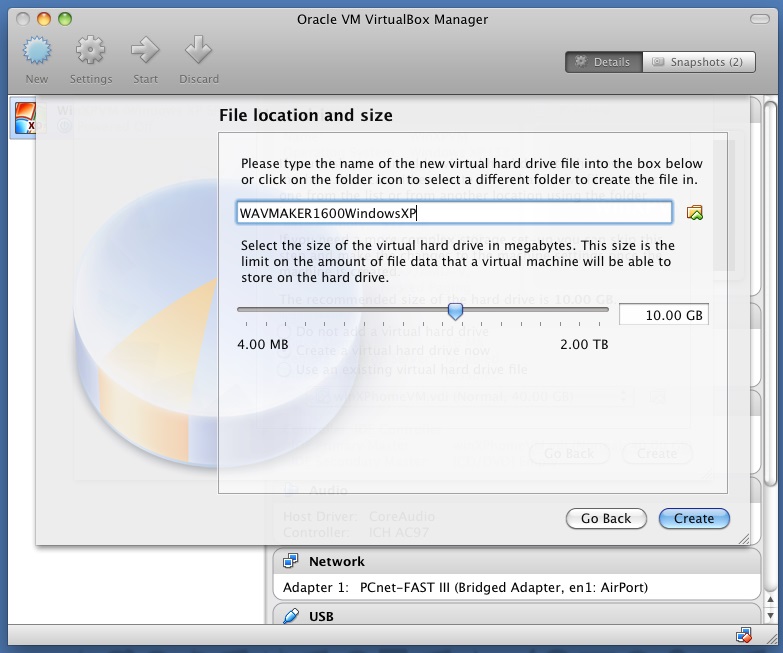
- Name it "WAVMAKER1600WindowsXP".
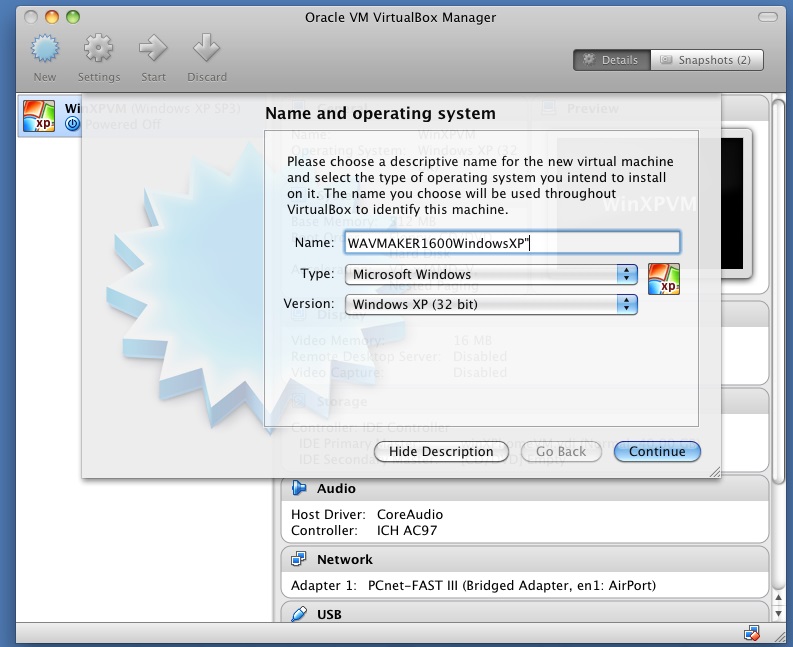
- Select Type Microsoft Windows.
- Select Version matching the install CD or ISO of your Windows Image. Click Continue.
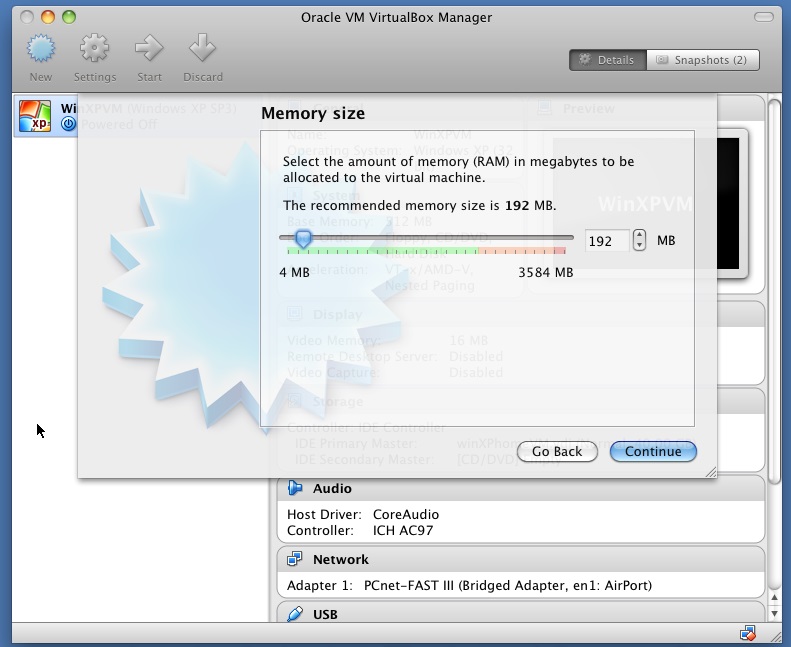
- Select memory size (192MB is the minimum and should be fine). Click Continue.
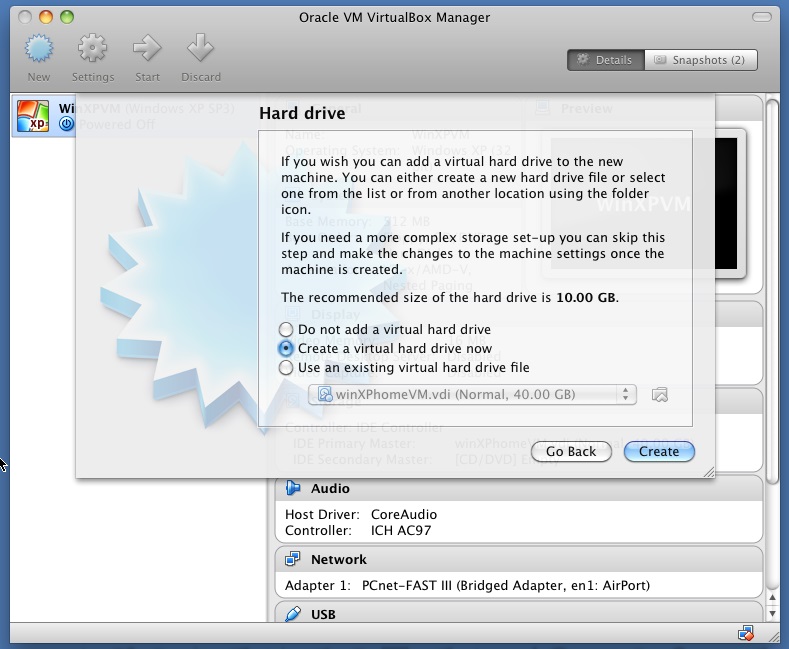
- Select “Create a virtual hard drive now”. Click Create.
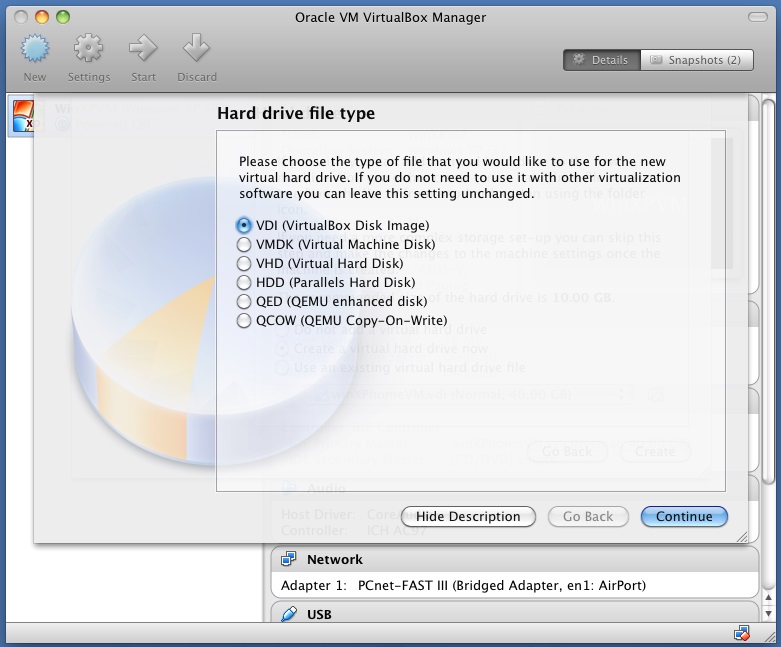
- Select Hard drive file type. I usually use VDI but it shouldn’t matter what you select. Click Continue.
- Select Dynmaically allocated. Click Continue.

- Select the size of the drive you want to create. This is the maximum disk space on your Mac OS X system it’ll ever use. Click Create.
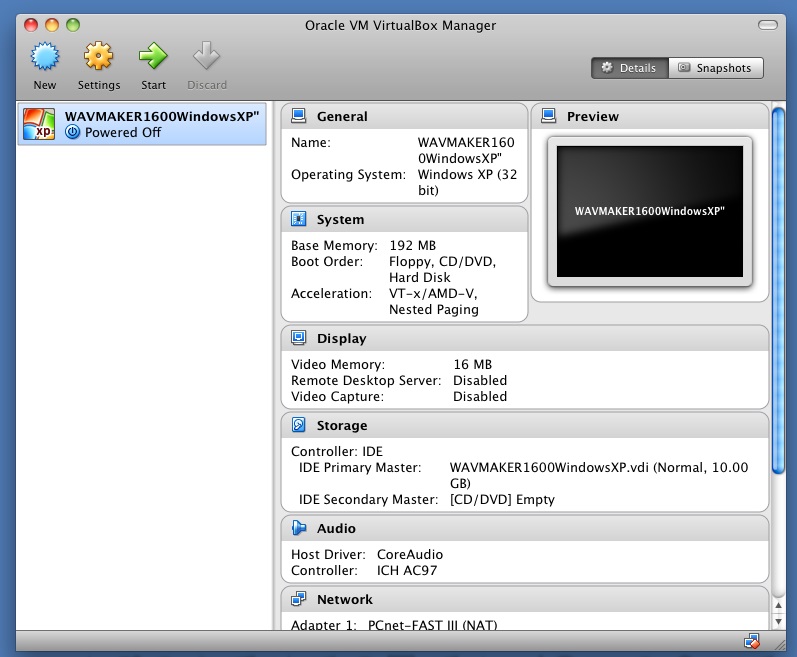
- On the Main Virtualbox Window the new VM you created will appear in the list of VMs. Select it and click Start in the menu above the list.
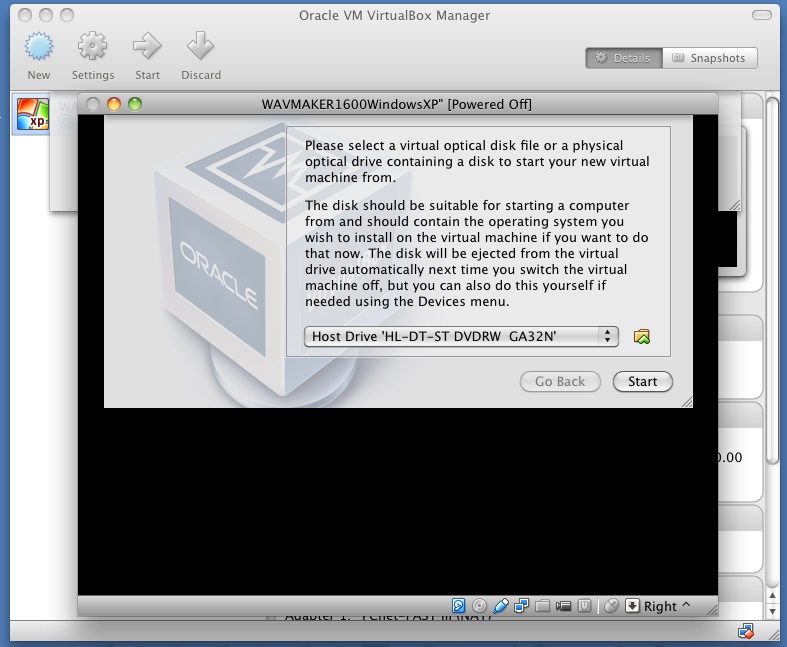
- The first time you startup you’ll see what’s in the following figure – asking you what media you want to boot in your Virtual Windows PC. This is where you either select “Host Drive” if you have a Windows install CD inserted in your Mac CD drive, or click the little folder icon and find the .ISO install image on your Mac Drive.
- Follow the Windows installation instructions to install windows on your VM. Note that the only hard disk the VM has access to is the virtual one you setup, so you can’t damage your Mac OS hard drive at all during the Windows installation.

- Once your Windows installation is completed, remove the CD from your Mac CD drive or click the little CD icon in the bottom bar of the Virtualbox VM window and select “Remove disk from virtual drive”. Then the VM will boot up into Windows. Shutdown windows when all the installation steps have been completed and before you install the WAV-MAKER-1600 software.
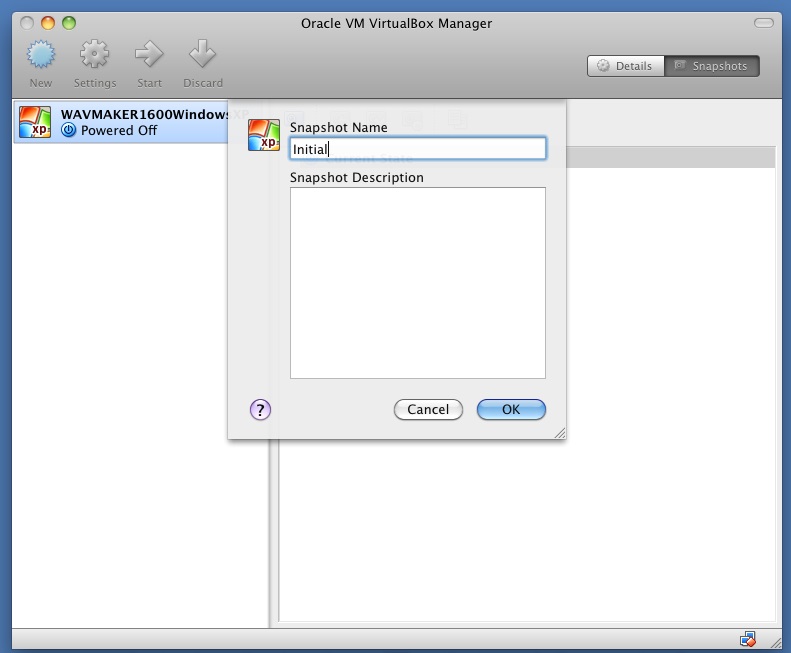
- Create a “Snapshot” of the VM. This will “freeze” a copy of the state of the VM at the current (unchanged) point and you’ll be able to restore it to (and clone it from) this state in the future. Name the snapshot “Initial”.
- Create a folder “BR1600 Songs” in your Documents folder on your MAC.
- Now you need to setup your Mac to share a folder with your Windows machine. In the “System Preferences” select “Sharing” and enable “File Sharing” with Windows PCs. Add your folder called “BR1600 Songs” to the “Shared Folders” list (use the + sign). Since you’ll be logging in with your own account this is all you need to do.

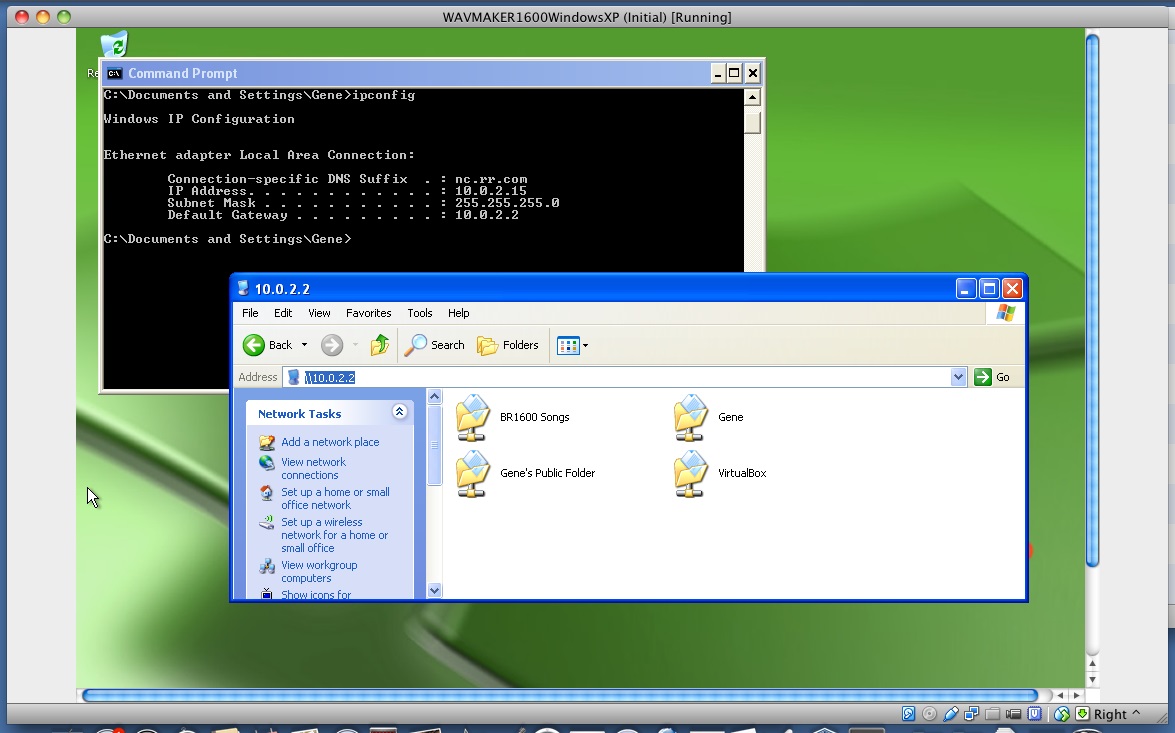
View Image Full Size - Now boot up your Windows VM in Oracle Virtualbox and map a drive to your Mac OS X pc. Open a command prompt and type “ipconfig” to check what IP address is assigned to the Windows VM. This probably will match what is in my screenshot. The “Default Gateway” in the output of this command should be your Mac’s internal IP address. In this example during my installation the IP address was 10.0.2.2. Open Windows explorer and click “View->Toolbars->Address Bar” if it’s not visible. Type “\\10.0.2.2” and you should get a login prompt from your Mac. Enter your name and password and it should show you the shared folders.
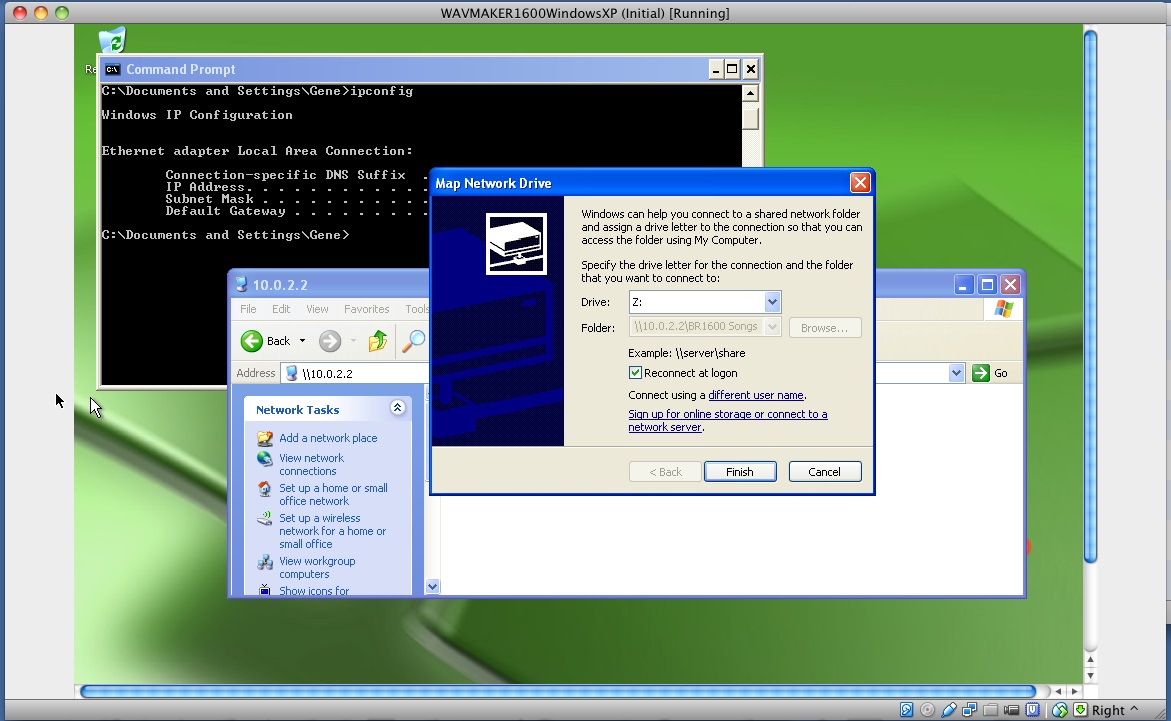
View Image Full Size - Right-click on “BR1600 Songs” and select “Map Network Drive”. Choose a drive letter (e.g. Z:) and leave “Reconnect at logon”. Click Finish.
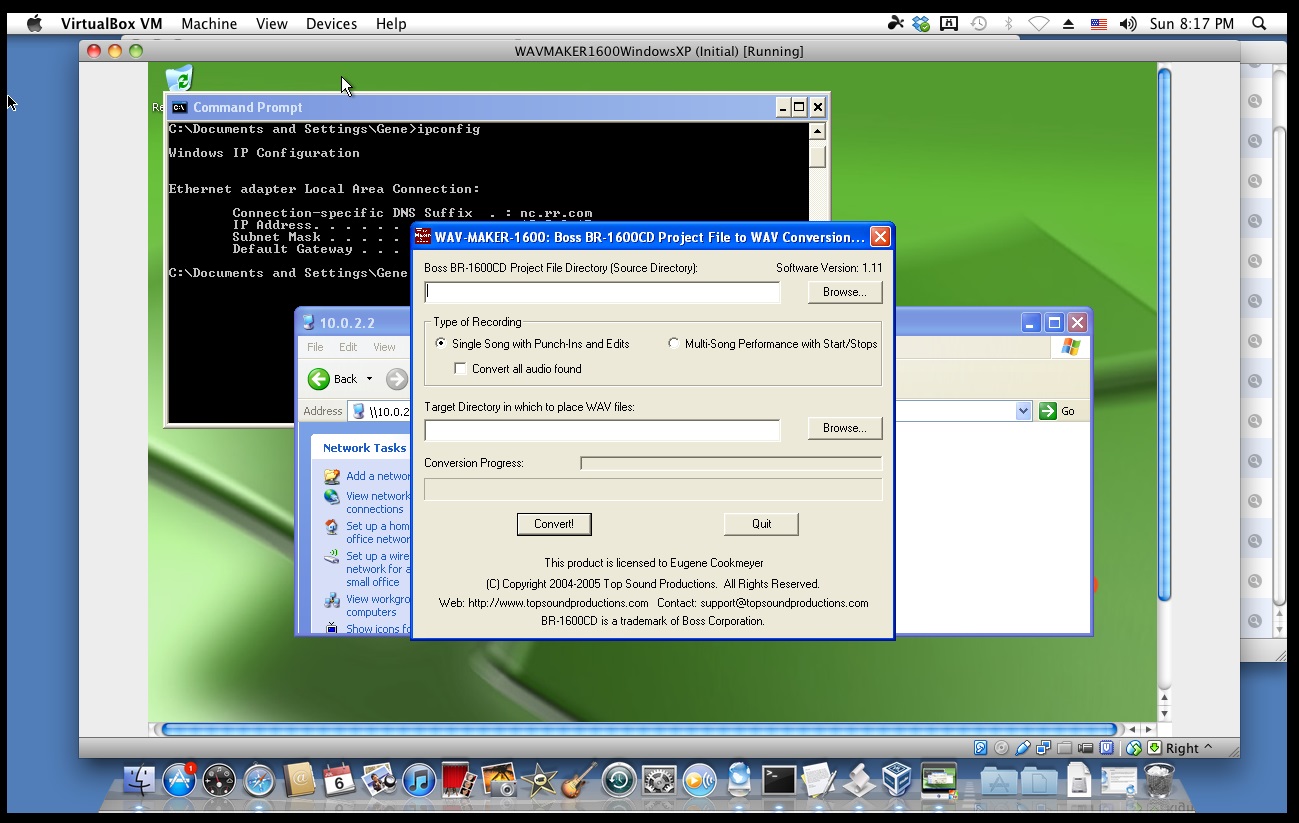
View Image Full Size - Now the Z: drive should be available every time you boot your Virtual Windows PC.
- Now it’s time to install WAV-MAKER-1600 on your Windows VM. Insert the disk in your Mac drive and access it from your Virtual Windows PC. Follow the install steps. In my case I created a folder called “WAV-MAKER-1600 Install” on my “BR-1600 Songs” folder on my Mac and installed the software from there (e.g. put the contents of the CD or .ZIP file in that folder and unzip it).
- Now you can run WAV-MAKER-1600 in your Windows VM using the Z: drive for accessing your song directories and putting the converted WAV files back on the Z: drive.
View Image Full Size - Shutdown your Windows VM (via the Windows Start menu) and create a snapshot of your WAV-MAKER-1600 Installed Windows VM… this way you can always restore the snapshot if you need to minimize the used disk space of your Windows VM.
Sorry for so many instructions but this is a more complex situation than using native Windows on a PC. But it is doable as you can see from my screenshot figures.
If you can get to step #22 successfully, you’re ready to order WAV-MAKER-1600…
Happy Recording!
BR-1600CD is a trademark of Boss Corporation
 |
Order WAV-MAKER-1600 today! Visit this link to order now!. |